Sonoff SV Safe DIY a smart door lock WiFi Wireless Switch Smart Home Module Support Secondary Development
13 in stock (can be backordered)
- Remote ON/OFF–Turn electrical devices on/off from anywhere
- Low Power Supply–5-24V DC low voltage input
- App Support –Free iOS and Android mobile App eWeLink
- Sync Status–Real-time device status provided to App
- Timing–Set scheduled/countdown timers to turn on/off at specified time
- Share Control– Control your smart home together with your family
- Scene–Turn on/off a gang of devices with one tap
- Smart Scene–Triggered on/off by temp, hum or other environmental conditions from sensor
- Compatibility –Works perfectly with Amazon Alexa, Google Assistant, IFTTT, Google Nest
New device for makers who want to build their own smart home system.
Sonoff is a universal switch for your smart home system to remotely turn on / off appliances. To work with the Sonoff SC, you will dig more possibilities. Learn more about Sonoff SC
₹740.00 ₹5,500.00
13 in stock (can be backordered)
| Quantity | Fixed price |
| 1 | ₹740.00 |
| 2 - 5 | ₹559.00 |
| 6 - 10 | ₹429.00 |
| 11 - 20 | ₹421.00 |
| 21 - 99 | ₹408.00 |
| 100 - 199 | ₹403.00 |
| 200 - 8500 | ₹380.00 |
Overview
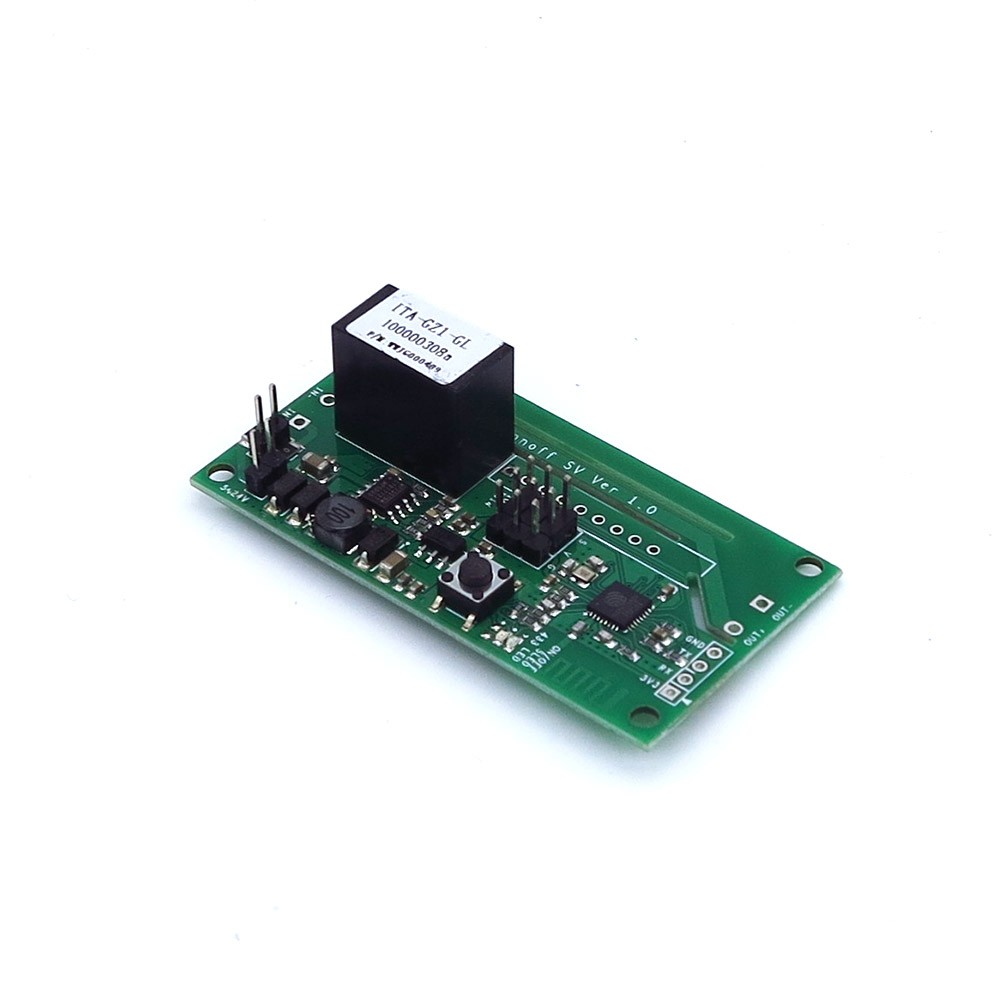
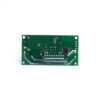
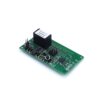
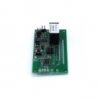
Sonoff SV is a low voltage switch. The low voltage light switch supports 5-24V power supply. Power supply separation enables it to control both AC and DC power, although some welding is required for this purpose. It has GIPO reserved to support secondary development. This product does not have 433 RF function and shell.
Sonoff SV low voltage WiFi switch is an affordable device that provides customers with smart home control. The low voltage WiFi switch is a WiFi based wireless switch that can connect to a wide range of appliances. Sonoff SV low voltage remote switch transmits data to a cloud platform through the WiFi router, which enables customers to remotely control all the connected appliances, via the mobile application eWeLink. The cloud server of Sonoff SV is Amazon AWS global server.
Sonoff SV low voltage wireless remote switch makes all home appliances smart. As long as the mobile has network, customers can remotely control the appliances by turning them on off from anywhere at any time. Another feature available is to set timing schedules for the appliances, which can include countdown, scheduled on/off, and can thus, help customers maintain an easy life.
The mobile application eWeLink enables customers to control the appliances easily. The iOS version of the application can be downloaded in App Store while the Android version in Google Play.
Works With Amazon Alexa
Check out the amazing features of Sonoff below:

Features
- Remote control the connected device on app from anywhere
- Tracking real-time device status on app
- Supports max 8 enabled schedule/countdown timers
- Reserves GIPO to support secondary development
- Works with Amazon Echo, Echo Dot, Amazon Tap
- Works with Google Home, Google Home Mini, Google Nest
- Works with IFTTT
-
-
Hi, welcome to use Sonoff SV! Sonoff SV is a low power supply Sonoff version, which supports 5-24V input.
1. Download “eWeLink” app.
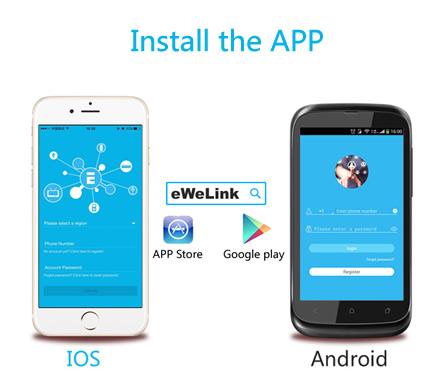
Search “eWeLink” in APP Store for iOS version or Google play for Android version.
2. Schematic diagram of equipment installation.
In default mode, it can be powered up with 5V-24V DC, or 5V DC.
You may change the device to isolated mode, two resistors must be removed first.

3. Add Device
1. Power up the device.
2. Press the button for 7 seconds until the green LED fast blinks.
Go to eWeLink, click “+”.

If the led blinks like this: please select Quick Pairing Mode (TOUCH), tap Next.
If the led blinks like this: a. If the device firmware is 1.6.0 or higher, please select Quick Pairing Mode (TOUCH). Otherwise, it will fail to add the device. Click Next.b. If the firmware of above models is lower than 1.6.0, please select Compatible Pairing Mode (AP) icon, click Next. iOS users should go to Phone Setting>WiFi>connect the WiFi begins with ITEAD-******, enter default password 12345678. Go back to eWeLink, click next.
3. It will auto-search and connect smart home device.
4. Input your home SSID & password:
4.1 If no password, keep it blank.
4.2 Now eWeLink only support 2.4G WiFi communication protocol, 5G-WiFi is not supported.

5. Next, eWelink register and add it to your account,it takes 1-3 minutes. When this complete, you can give your device a name.
6. Name the device to complete.
Maybe the device is “Offline” on eWeLink, for the device needs 1 minute to connect to your router and server. When the green LED on, the device is “Online”, if eWeLink shows still “Offline”, please close eWeLink and re-open.4. APP Features
1. WiFi remote control and device state
Turn on/off by tapping on device icon. Device state always simultaneous display on APP.
2. Share Control

The owner can share the devices to other eWeLink accounts. While sharing devices, both should stay online on eWeLink. Because if the account you want to share is not online, he/she will not receive the invitation message.How to make it possible? Firstly click Share, input the eWeLink account (phone number or email address) you want to share, tick the timer permissions (edit/delete/change/enable) you want to give, then click Next. The other account will receive an invitation message. Click Accept, the device has shared successfully. The other user will have access to control the device.
3. Timing

Support max 8 enabled single/repeat/countdown timing schedules each device.
4. Scene/Smart Scene
Scene allows triggering on/off your devices automatically. Scene Settings is in the upper right corner of Device List. You can set up scenes or smart scenes to trigger on/off the Sonoff SV.
Users should select “Click to execute” in the condition, add different existing devices, name the scene and save it.
5. Security mechanism
One device one owner. Other people can not add the devices that have already been added. If you want to add your device to another account, don’t forget to delete it first.
6. Update
It will auto-remind you of new firmware or version. Please update as soon as you can.
5. Problems and solutions
Read the detailed FAQ on Itead Smart Home Forum. If below answers can’t solve your problem, please submit a feedback on eWeLink.
1. My device has added successfully but stays “Offline”.
Answers: The newly added device need 1-2 min to connect to your router and the Internet. If it stays offline for a long time, please judge the problem by the green led status:
1.1. Green led quickly blinks one time and repeats, which means device failed to connect to the router. The reason may be you have entered wrong WiFi password or your device is too far away from the router, which causes a weak WiFi signal. The device can not be added to the 5G-wifi-router, only the 2.4G-wifi is OK. At last, make sure that your router is MAC-open.
1.2. Green led slowly blinks one time and repeats, which means the device has connected to router and server but failed to be added to the device list. Then power on the device again, if it still not working, just add the device again.
1.3. Green led quickly blinks twice and repeats, this means the device has connected to the router but failed to connect to the server. Then please confirm your WiFi router works normally.
2. Why the APP can’t find the device in pairing status?
Answers: That’s because of your phone’s cache. Please close the WLAN of your phone then open it after a minute. At the same time, please power off the device if you can, then power up to try again.
3. My WiFi is expired, can I connect the devices to LAN?
Answers: the Sonoff SV supports to be controlled by LAN(Update in 15/10/2017, LAN function has been stopped).
-
| Weight | 0.015 kg |
|---|---|
| brands | Sonoff |
Specifications:-
| Weight | 15 g |
| Brand | SONOFF |
| Product Type | Wi-Fi Smart Switch Module |
| Power supply | 5~24V |
Warranty Condition
Does this product checked before shipping them to me?
Yes., of course.We have a professional Quality Control team. They will check carefully for each item we received from factory to avoid sending defective goods to our customers.
If a item is found defective in our Technical QC team , it will be returned to the factory. Please don’t worry about receiving a defective item because we are committed to being a trustworthy
Products Guaranteed
Factories that supply Sonoff are strictly evaluated by us, and we provide you an even better reassurance of consistent high quality thanks to our Sonoff Technical QC team. We double-check the contents of all orders carefully before dispatch to our customers a. Sonoff will maintain all product serial number and products ID for stop delicacy.
Lead time
Processing time 1-2 business days normally: During this period, we do strict quality-control tests and get the items carefully packed.
Delivery time
Delivery time 3-8 business days normally in India.
Who will be delivered the product to me
You order will dispatch from your nearest local authorized dealer by ShipRocket/Delhivery.com.
What should I do if my items arrived damaged?
When using shipping services, we want the delivery to be as fast as possible. At the same time, we expect from the courier company to handle our shipments with great care throughout their journey. Packages reach several depots and go through multiple hands until the driver delivers them to their recipients. Even though we might assume it is the courier’s fault for the damaged delivery of the parcel, several other situations explain it is not always the case.
If you order got damaged or lost during transits so Rarely, rough handling by the courier can lead to physical damage to your goods, e.g. broken screen. In this condition, Apply for Insurance claim terms & conditions applicable.
Bulk Order
[sform]2[/sform]
Based on 22 reviews
You may also like…
-
DIY Mode Switches, Ewelink Devices
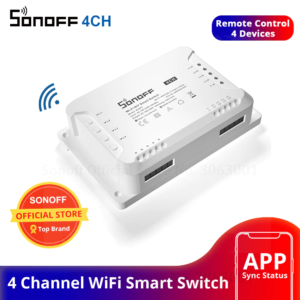
SONOFF 4CH R3 -230V 10A 2200W 4 Gang WiFi DIY Smart Switch Inching/Self-Locking/Interlock 3 Working Mode APP Remote Control Switch Works with Alexa and Google Home
 DIY Mode Switches, Ewelink Devices
SONOFF 4CH R3 -230V 10A 2200W 4 Gang WiFi DIY Smart Switch Inching/Self-Locking/Interlock 3 Working Mode APP Remote Control Switch Works with Alexa and Google Home
- Remotely control connected lights or devices via APP
- 3 working modes with self-locking, interlock and inching mode for even remote control garage door and roller blinds
- Support scheduling a timer to make devices automatically start and stop to work
- Customize smart scenes to make the device connected with the switch to trigger other devices
- Share the control permission of devices to other accounts to control together
- Check real-time ON/OFF status of devices on your mobile phone
- Power on state allows users to set the On/Off/Keep status for the connected device before power failure and ensure it remains the arranged status after power restoration
- Remote ON/OFF–Turn electrical devices on/off from anywhere
- App Support –Free iOS and Android mobile App eWeLink
- Independent control–Control each gang separately
- DIN Rail Mounted– Great for industrial control
- Sync Status–Real-time device status provided to App
- Share Control–Control your smart home together with your family
- Timing–Set scheduled/countdown timers to turn on/off at specified time
- Scene–Turn on/off a gang of devices with one tap
- Smart Scene–Triggered on/off by temperature, humidity or other environmental conditions
- Voice Control –Works perfectly with Amazon Alexa, Google Home
SKU: M0802010003






AS****WF –
good DIY product.
AS****WF –
AI****FB –
All good..
AI****FB –
SD****DF –
I am very happy with the product quality and price also.
SD****DF –
KL****VB –
Great product!
KL****VB –
WE****TR –
I am really satisfied with this product and I do recommend it !!!
WE****TR –
RF****JH –
Super
RF****JH –
AS****RD –
great service and super fast delivery will order again
AS****RD –
HT****YH –
The build quality is very good.
HT****YH –
AS****KJ –
The app user interface is very easy and operative
AS****KJ –
ZV****DF –
Very good quality DIY WIFI wireless switch, for low voltage operation but capable to drive high voltage loads.
ZV****DF –
SL****DG –
Great value for price.
SL****DG –
DF****SE –
This is my 2nd order of this great quality DIY WIFI wireless switch, that is perfect for low voltage operation and excellent control of high voltage loads.I have already used some of them to set up a remote control for my solar power DIY installation.
DF****SE –
KD****FH –
5V one-channel sonoff wifi driver, simple design contacts for power supply, connection is without cut
KD****FH –
SF****IJ –
Good price, fast shipping👍🏻 thank you sonoff.
SF****IJ –
FR****DF –
Visually, everything matches
FR****DF –
VN****FG –
It is very easy to setup and it provides a lot of flexibility and accuracy.
VN****FG –
SD****FD –
Good one, It is applicable when a battery or low voltage power supply is used (ie off grid apps) in smart home remote control, automation or power control projects.
SD****FD –
FH****PL –
very good. Thank you.
FH****PL –
JS****DG –
Original product. Excellent!
JS****DG –
RU****FG –
As described. Very good wifi switch
RU****FG –
DF****GN –
So many things you can do with it.
DF****GN –
RU****FG –
We can make the safest purchase from here.
RU****FG –